


Table of contents
Objective:
Create a comprehensive real-world CI/CD pipeline utilizing Jenkins. This pipeline should be capable of triggering upon code commits to GitHub. The process will involve building and testing the code, conducting static code analysis to ensure code health, and utilizing a Docker agent to construct an image. The final step includes pushing the image to DockerHub. Additionally, the CD aspect entails configuring the Argo CD operator within Kubernetes to facilitate seamless code deployment.

So this will be the process:
Code Changes Alert: Imagine your code as the heart of a game, stored on GitHub. Whenever you or your team tweak the code, Jenkins, like a watchful guard, gets a signal and springs into action.
Building and Testing: Jenkins takes the newly updated code and compiles it, just like assembling puzzle pieces. It also runs automated tests to ensure the code works well and doesn't misbehave.
Code Quality Check: Jenkins wears a detective hat too. It scans the code for any lurking problems, such as rule violations or security gaps. If it spots issues, Jenkins tries to patch them up.
Creating an Image: Here's where Docker joins in. Jenkins collaborates with Docker to take a snapshot of your code, called a Docker image. This image includes everything the code needs to run smoothly.
Image Storage: DockerHub is like a storage hub for Docker images. Jenkins and Docker put the image there, making it available for anyone who needs to use your code.
Deployment Direction: Now enters Argo CD, acting as a conductor for your code's performance. It orchestrates the deployment process on Kubernetes, making sure your code performs well gracefully across different platforms.
Let's start working:
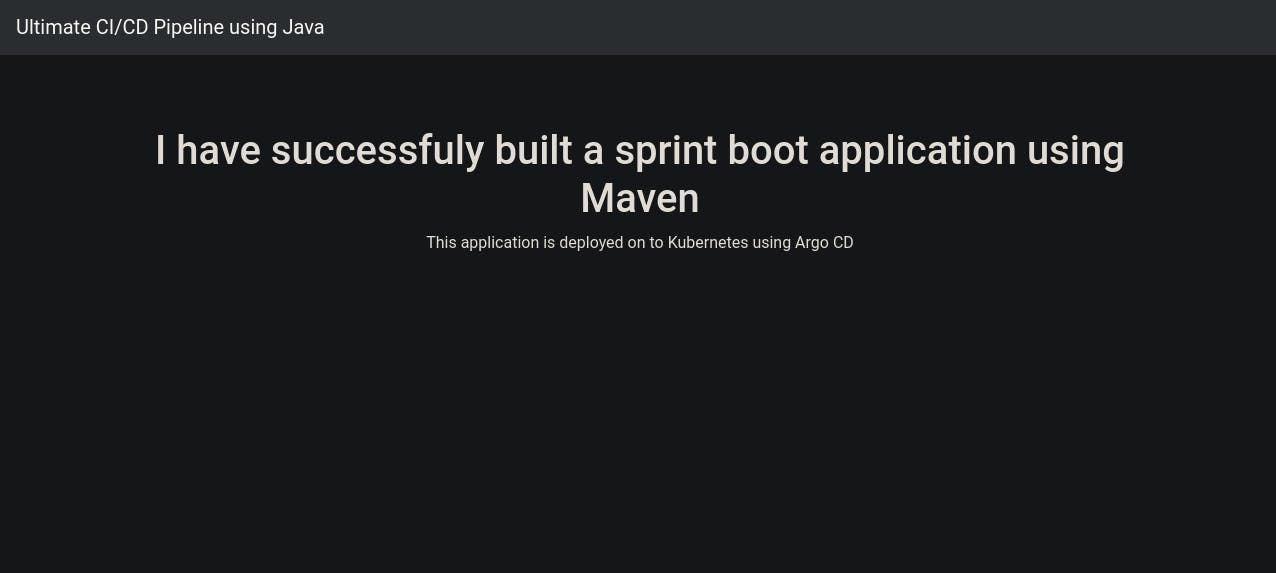
Run Code Locally: To begin, we'll run the code on our computers to see if there are any errors. We've created a dummy web app using Java, and it relies on Maven to install its necessary parts. In the image below, you can see that we've successfully set up all the things we need to run our web app.

Start the Server: Our next step involves building our application code using Docker and running it on our local system. Docker, being lightweight, is ideal for testing purposes. Once we've completed the build process, we'll expose port 8010 to run our Docker image.
AWS instance type: Now we will start aws ec2 instance t2.large because our project cant works on 1 CPU and 1 gib.
Start Jenkins: "Let's start building our CI pipeline using Jenkins. Once Jenkins is installed, we'll enable it using the command 'systemctl enable jenkins'. Don't forget to edit inbound rules to allow Jenkins to run on the server.
The Jenkins user interface is really friendly, especially for beginners. To begin, we'll click on 'New Item' and name it 'real-world-demo-project'. Then, we'll choose the 'Pipeline' option.
Rather than creating the pipeline directly in Jenkins, we're going to fetch it from our Git repository. Wondering why? Well, in many companies, different team members make code changes. By bringing the pipeline from Git, the review process becomes smoother. Plus, having a change history means we can easily go back to previous code if the new changes don't work as expected. As part of the setup, we'll need to specify the location of the Jenkinsfile."

Jenkins Plugins and Credentials: Let me walk you through the Jenkinsfile process. But before that, we need to install some essential plugins in Jenkins: • Git plugin • Maven Integration plugin • Pipeline plugin • Kubernetes Continuous Deploy plugin • Similar to what we did locally, our initial steps include:
Checking Out Code: We'll start by checking out the source code from the Git repository and running it to test.
SonarQube Setup: For generating a secret token, we'll set up SonarQube locally. This token will be used by Jenkins to interact with SonarQube. We'll add this token to Jenkins' credentials section. So, whenever the pipeline requires a SonarQube login, Jenkins will automatically use this token to test changes.
SonarQube Token Generation: Take a look at the image below to see the process of generating a SonarQube token:

Push image on DockerHub: After the code analysis, the pipeline will proceed to push the image to DockerHub. To accomplish this, we'll also need to configure Docker credentials in Jenkins. These credentials will allow Jenkins to push the image to our Docker registry. After a push, we can see the image in docker hub

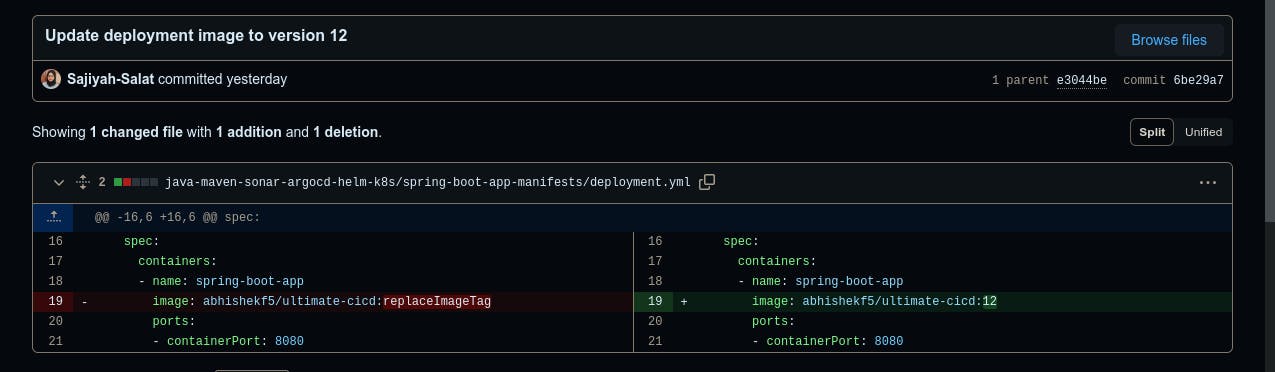
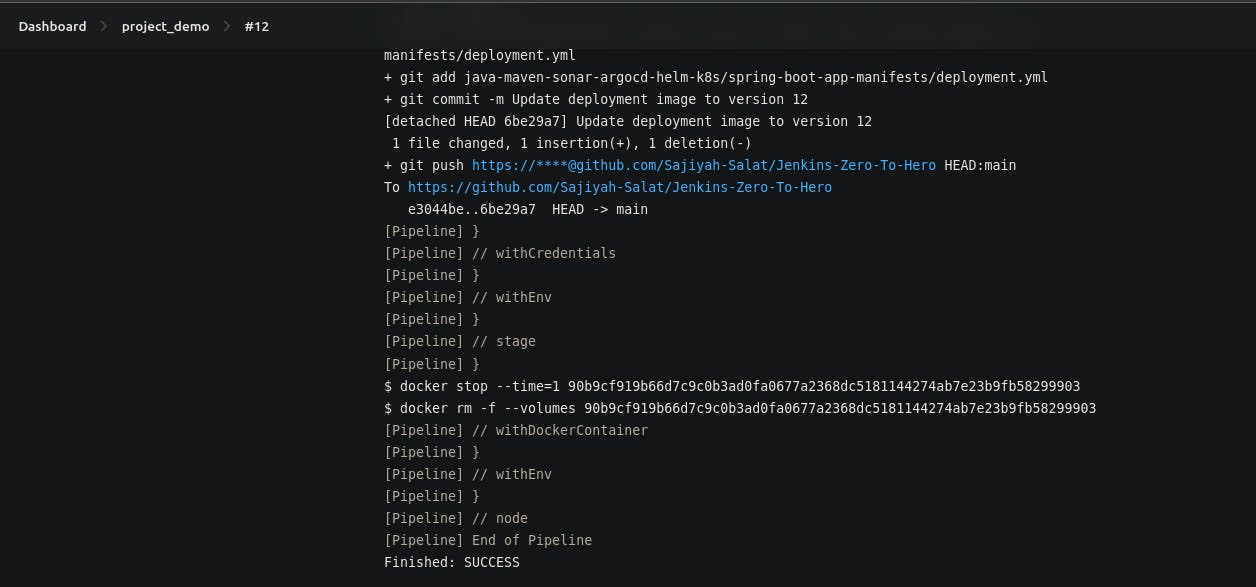
Update Deployment file: "Once the Docker push is successful, the pipeline will log in to our GitHub repository. For this login, we'll configure a GitHub token in the Jenkins credentials section. This token will ensure a smooth and successful login process. In the next step, the pipeline will update the deployment.yaml file with the latest image. This update will ensure that the deployment uses the most recent version of the image."
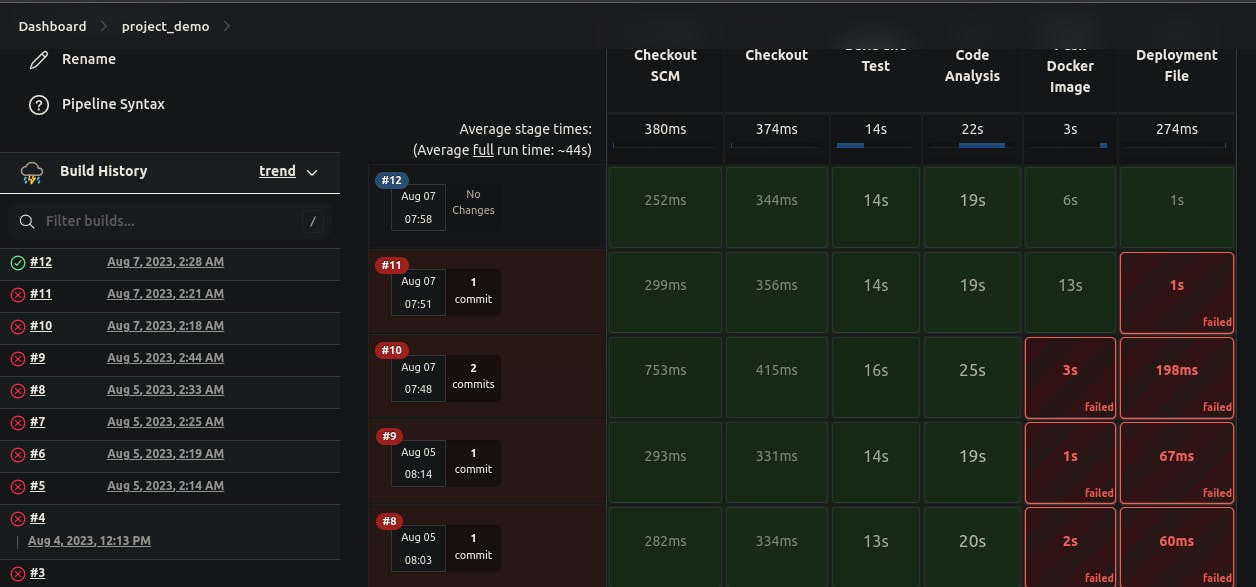
Finally: Voila, Here we got our successful CI pipeline. You can see it in the below images.
CD:
"Next up, let's set up the CD pipeline. We've chosen the Argo CD operator, a widely-used CD tool for production environments. This tool operates on Kubernetes and is responsible for deploying our code. Here's how we'll do it step by step:
- Cluster Setup: We'll begin by launching a Minikube cluster. Then, we'll install OLM (Operator Lifecycle Manager) and the Argo CD operator. These tools will help us manage the deployment process
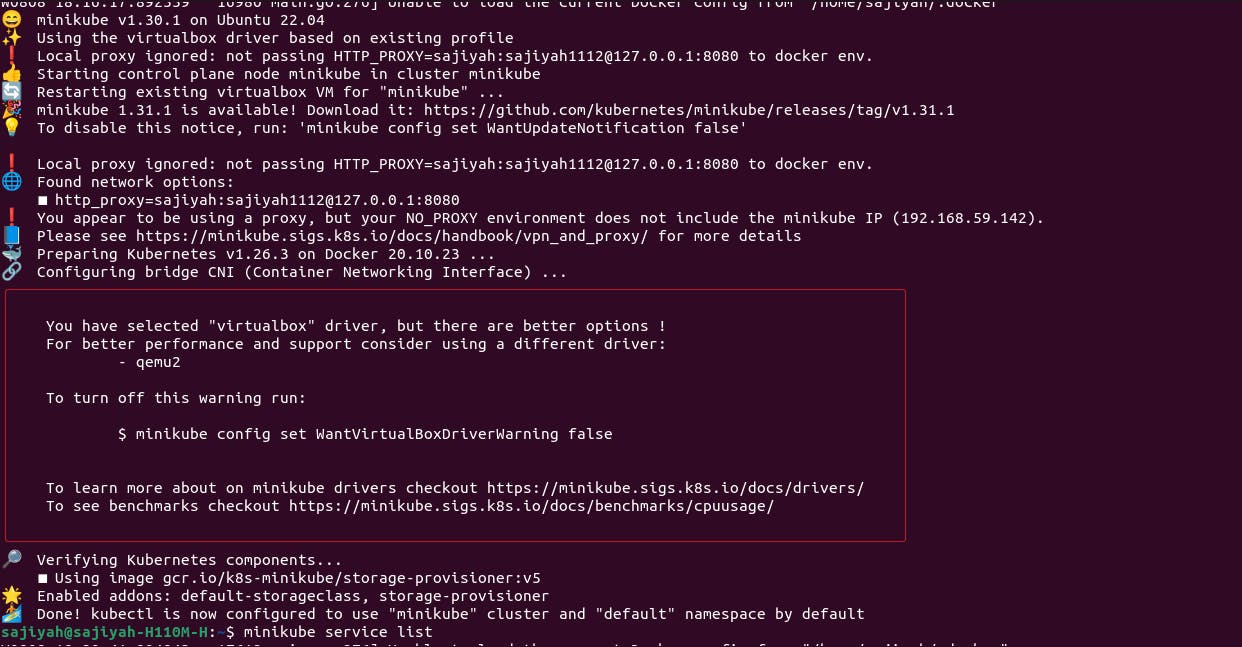
YAML Deployment: Moving forward, we'll grab a simple YAML file from a specific source. By running the command 'kubectl apply -f {filename.yaml}', we'll apply this file. This action will set our pods in motion.
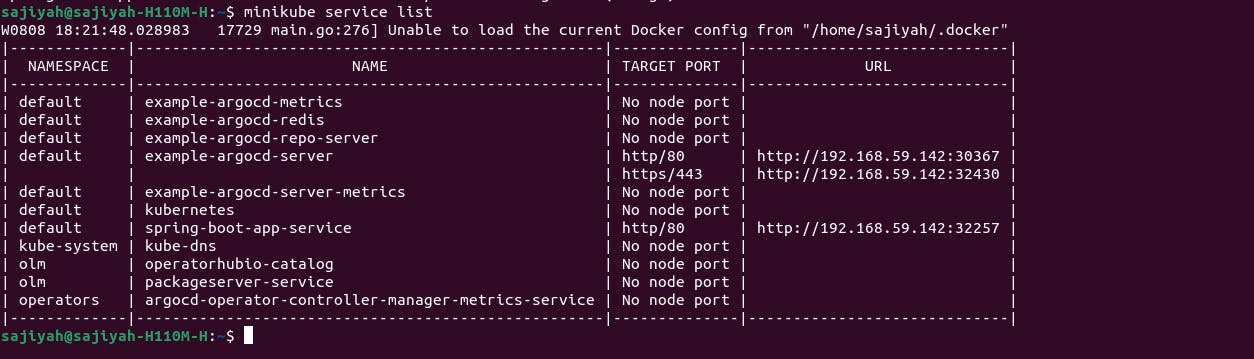
Accessing Argo CD: After the successful application of the YAML file, our pods will be up and running. We can find the Argo CD web app port using 'minikube service list'. Once we're in, after logging in successfully, we'll click on 'New App' and provide the necessary details.
- Deployment Time: With hopeful anticipation, we'll hit the 'Apply' button. And guess what? We'll have successfully deployed two pods. Check out the image below for a visual representation of our achievement."
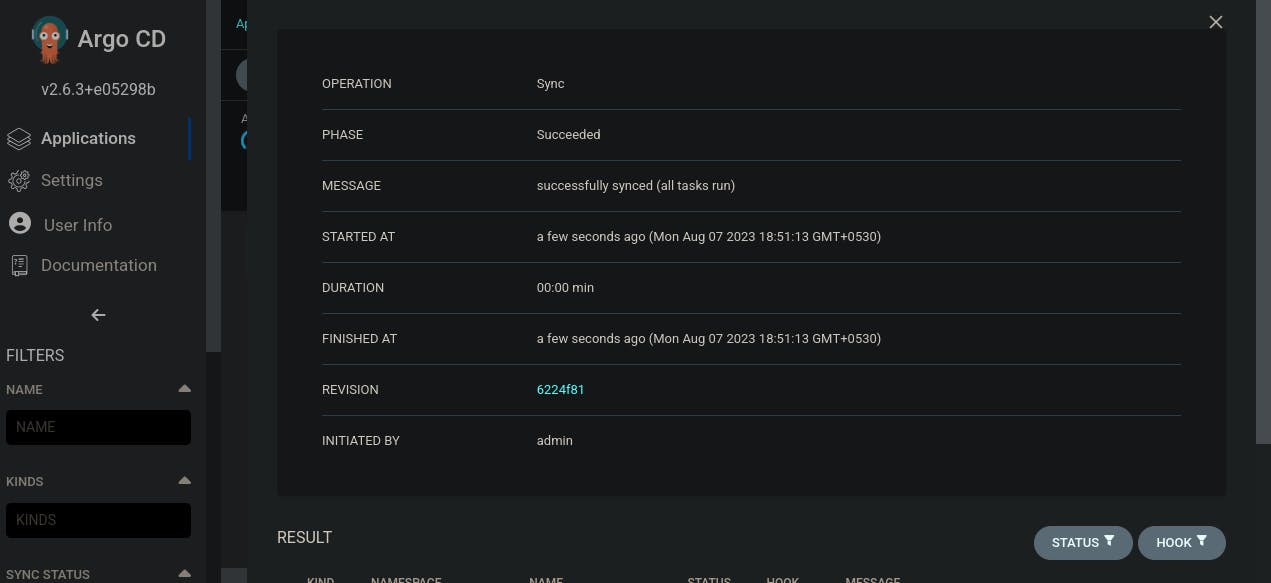

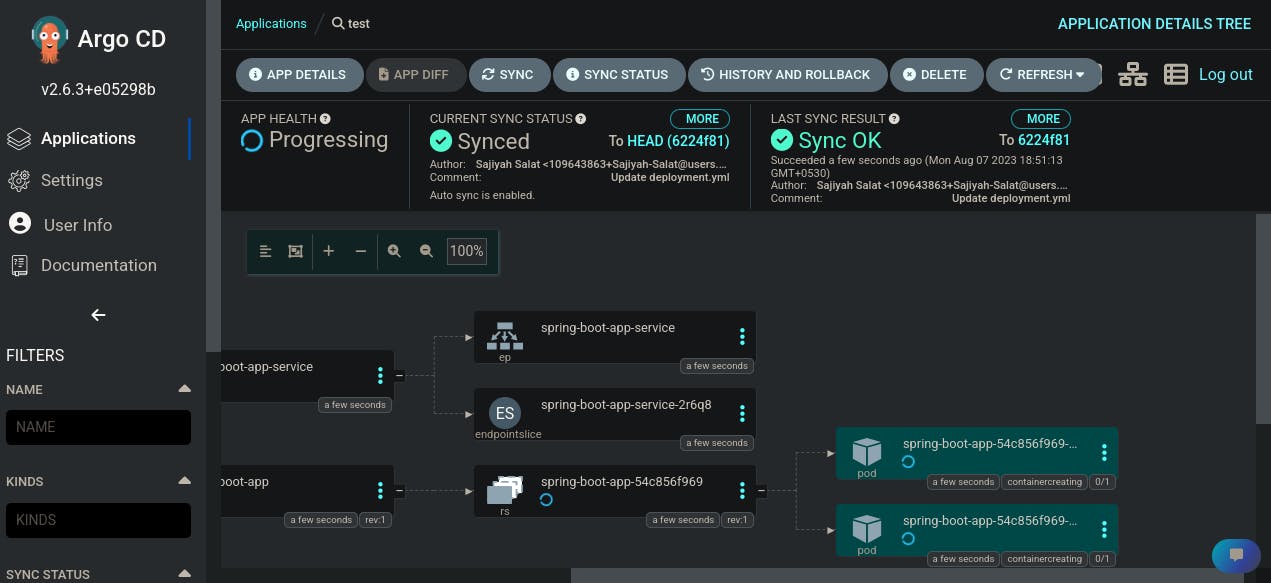
This is the successful end of CD pipeline
"Reflecting on this journey, I've gathered some valuable lessons:
Consistency and Patience: Even in smaller projects, consistency and patience are key. Challenges will arise, but perseverance pays off.
Choosing the Right Environment: Deciding where to build your project matters. For my relatively larger project, opting for an EC2 instance was a wise move. It provided the necessary resources, like a t2.large instance, to handle the workload efficiently.
Local vs. Remote Development: Initially, I started building the project locally, but encountered obstacles when my SonarQube pipeline failed due to the inability to reach SonarQube on localhost. The solution: shifting the entire project to an EC2 instance and starting fresh.
Debugging and Naming: Debugging is an integral part of the process. A simple oversight, like not giving a proper name to my Docker registry in the Jenkins file, caused a hiccup. It highlighted the importance of meticulous attention to detail.
Integration of Tools: The project led me to understand the intricate process of integrating diverse tools, including Docker, Jenkins, Git, SonarQube, Argo CD, and Minikube, to construct a comprehensive end-to-end pipeline.
Configuring Plugins and Credentials: Learning to configure plugins and manage credentials in Jenkins was a vital skill. It ensured a secure and seamless flow throughout the pipeline.
Adapting Jenkins Files: I grasped the art of making necessary adjustments to Jenkins files to rectify broken pipelines. This flexibility ensured a smooth pipeline, even when challenges arose.
Docker Mastery: The project deepened my knowledge of Docker, including crafting Dockerfiles and effectively utilizing them to encapsulate applications and dependencies. In the end, this journey reinforced the importance of professionalism in development. By overcoming obstacles, understanding different tools, and refining my skills, I've not only built a functional pipeline but also enhanced my abilities as a developer."
Credits: Tutorial on youtube by AbhishekVeermalla
Let's Connect: